Like any other article, items, objects, events, activities, and equipment, columns, on the other hand, need or should be named. Naming is the general act or process of assigning names or a name to a particular object, item, animal, human, etc. Mainly, naming is done to define the uniqueness or differentiate one or more things from each other. To name a column is just granting the column a unique identity different from the other columns in a given spreadsheet.
We usually do column naming to help our data remain understandable and meaningful to the intended audience because it is hard to drive meaning from mixed up data. Once a column is assigned a name you are sure to find the data in the spreadsheet more and easier to analyze and also naming makes data retrieval fast and easy. Just as doing naming in other different fields appears easy and quick, the same case applies to the naming of columns in spreadsheets.
A couple of steps are incorporated when doing the naming of columns in Google sheets. We are going to look at them in detail with examples from screenshots of my already done work.
Step 1
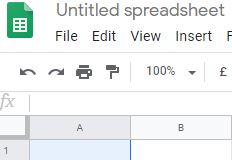
The first step is selecting the column you wish to give a name. Before you do the selection firstly you need to have created or opened a blank spreadsheet in your preferred web browser. After you have opened the blank spreadsheet you can now head to selecting your column. To select place your cursor on the bottom right corner of your column.

Step 2
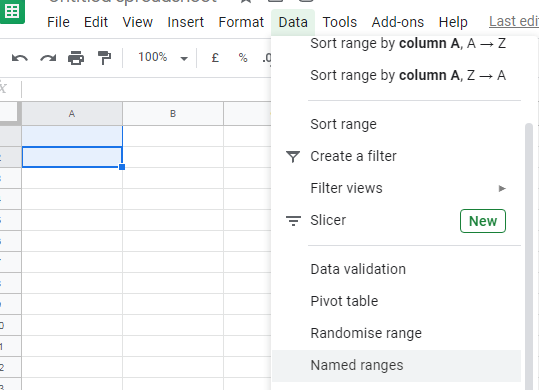
Your selected column appears in blue to mean it is selected. Navigate to the menu bar and click on the data. Clicking on data will give you a list of many other options or commands, scroll down to the one written named ranges.

Step 3
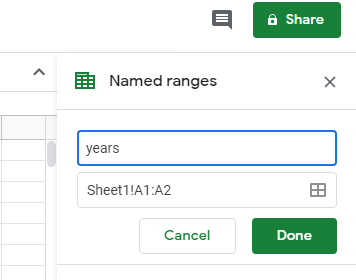
Finally, we click on named ranges which will open a window on the right which will have you enter the preferred name of the column you are working on. After typing the name, click on done to make the changes.


